
Zoom is primarily a communications platform, not a place to permanently store recordings. The steps below can help you move Zoom recordings to a secure, longer-term storage solution.

If you have questions about how best to manage your Zoom recordings, contact the instructional support team in your school.

Learn more about Panopto from Penn Libraries.

Class Recordings That Include Students

Zoom sessions that are initiated in Canvas and recorded to the cloud will automatically be posted to the Class Recordings area in Canvas and available only to people enrolled in the Canvas site. Watch a video demonstration of the process or follow the steps below.

    1. Check that both Zoom and Class Recordings are enabled on your course menu(s) in Canvas. To enable these menu options:
      • Click Settings on your course menu.
      • Click the Navigation tab.
      • Click the Zoom and Class Recordings button(s) and drag them above the line that reads “Drag items here to hide them from students.” Or, click the three vertical dots to the right of the Zoom and Class Recordings buttons and select Enable.
      • Click Save.

Zoom through Canvas

  1. Schedule and start meetings from the Zoom area within Canvas.
  2. Record to the Cloud when recording. By default, cloud recordings initiated through Canvas will automatically be posted to the Class Recordings folder and available only to people enrolled in the Canvas site.
    • It may take over an hour for long recordings to be available.
    • If you accidentally record a session that you do NOT want to share with students, delete it from the Class Recordings folder.

For class sessions recorded in Zoom without using the Canvas integration, these recordings should be moved from Zoom storage and uploaded to the Class Recordings/Panopto area in Canvas via a manual process. Once the videos have been moved to Class Recordings, they should be deleted from Zoom.

Watch a video demonstration of the process or follow the steps below.

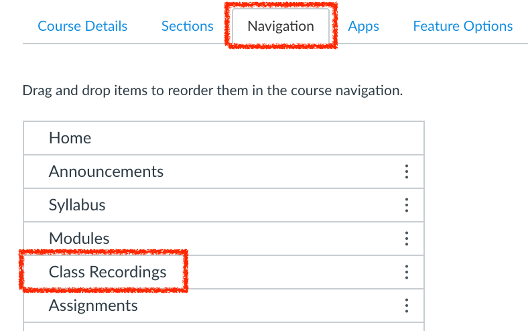
  1. Check that Class Recordings is enabled on your course menu(s) in Canvas. To enable this menu option:
    • Click Settings on your course menu.
    • Click the Navigation tab.
    • Click the Class Recordings button and drag it above the line that reads “Drag items here to hide them from students.” Or, click the three vertical dots to the right of the Class Recordings buttons and select Enable.
    • Click Save.

    Moving Zoom to Canvas 1

  2. Start the meeting and Record to the Cloud when recording meetings through Zoom.
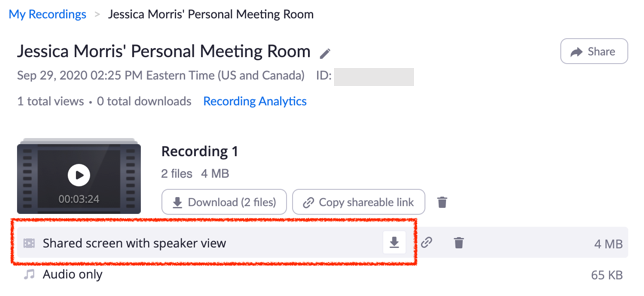
  3. Download the recording from upenn.zoom.us. Note that it may take over an hour for long recordings to be available.
    • Click Recordings.
    • Select a recording and download the video (mp4) file.

    Moving Zoom to Canvas 2

  4. Upload the video file (mp4) to Class Recordings in Canvas. Videos loaded here will only be available to people enrolled in the Canvas site.
    • Click the Class Recordings button on your Canvas course menu.
    • Click the Create button and then select Upload Media.

    Moving Zoom to Canvas 3

Pre-Recorded Lectures & Demonstrations

If you use Zoom to create pre-recorded lectures and demonstrations, you should also upload those recordings to the Class Recordings/Panopto area in Canvas. The Class Recordings area provides a secure way to store and share your recordings, including recordings you may want to use again in the future.

Follow the steps in Option 2 above to manually move pre-recorded lectures and demonstrations to Class Recordings in Canvas.

Recordings of Non-Course Related Content

For your personal use or to share with a small group, use Penn+Box or other school-provided storage solution.

Using your Penn-provided storage solution ensures that University data and intellectual property are securely protected.

  1. Download the recording from upenn.zoom.us.
  2. Upload the video file (mp4) to the Penn-storage solution of your choice.
  3. If needed, share the video with others.

Public Events or Presentations

For public events or presentations, use video platforms like YouTube or Vimeo

Do not share links to recordings stored in Zoom with the public.

  1. Download the recording from upenn.zoom.us.
  2. Upload the video file (mp4) to the video platform of your choice.
  3. Share the video with others.